
If you’re planning to build raised beds this year, consider at least one hugelkultur bed. These are basically ‘mounds’ utilizing woody debris (logs, branches) as both a composting amendment to soil and a water retention source for the beds. It mimics what happens on the forest floor, harnessing the process to produce very flavorful fruits and vegetables with minimal input from the gardener. The term hugelkultur comes from the Germans and in rough translation means ‘mound culture. The technique has been used for many centuries throughout eastern Europe.
The benefits of hugelkultur garden beds include:
· Moisture retention in the bed
· Increased soil fertility
· Improved drainage
· Repurposing woody debris that
would otherwise be discarded
· Decreased labor required to
produce food
If you have poor soil, areas with poor drainage, an arid environment, compacted soil, health or mobility restrictions, or a host of other gardening issues, hugelkultur would be very beneficial to you; hugelkultur beds are, essentially, large, layered compost piles covered with a growing medium into which a garden is planted. They are easily accessible for planting and harvesting, have been proven to work in deserts, and are virtually carefree once established. No need for annually adding compost or fertilizer, as the breakdown of the buried wood releases many nutrients to your hungry plants above. The decomposition also eliminates the need for tilling the soil, as it aerates it through releasing carbon.
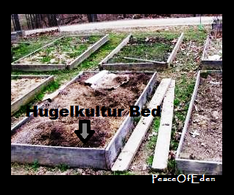
The premise behind this technique is to build a mound, usually 3-5 feet tall; however, the idea can be used in more traditional raised beds, if that is your desire. We created a bed in our raised garden area to test the technique. This is our second year with the bed and so far, we’re pleased with the results. Last season we grew tomatoes; this year we’ve planted lettuces, spinach and onions. We found last year we didn’t have to water the hugelkultur bed even once during the growing season, and it did very well. Some issues you do need to consider include the possibility that the rotting wood beneath the bed can pull nitrogen from the soil and also raise the carbon level too high. To combat this, we added lots of nitrogen rich rabbit manure to the bed when we constructed it. Also, you should avoid using certain types of wood for decomposition problems or toxicity; the best choices for the bed are maple, poplar, alder, apple, cottonwood, birch, and (dry) willow. Avoid oak, cedar, black walnut, locust, and wild cherry.
Some might argue the process isn’t very sustainable because to build the larger mounds, you would need to utilize heavy equipment. That is a valid point; however, this method is widely adaptable and we feel it is sustainable, as well. We hand dug our hugelkultur bed, but even if you use heavy equipment and create a large mound, only the initial building process could be considered ‘non-sustainable’. These beds last several years and require absolutely no watering. They are also eco-friendly in that they use otherwise discarded materials, as well as reduce through sequestration the carbon emissions into the environment.
To create your own hugelkultur bed, follow these simple steps:
1. Select an area approximately six feet by three feet.
2. Gather materials for the project:
· Fallen logs, branches, twigs, fallen leaves. Basically, if you have access to the woods, you have a nice hugelkultur ‘store’ with free materials. The best choices for logs are: maple, poplar, alder, apple, cottonwood, birch, and (dry) willow. Also, using aged and semi-rotting wood rather than freshly cut might help to decrease the pulling of nitrogen from the soil as the logs decompose.
· Nitrogen rich material (manure or kitchen waste work well and help to maintain a proper carbon to nitrogen ratio in the decomposing mass within the hugelkulter bed).
· Top soil or composted soil (enough to cover the other layers of the bed with a depth of 6-8”) and some mulching material (straw or newspaper covered with leaves work well).
3. Lay the largest logs you’ve gathered down as the first layer of the hugelkultur bed. You can follow with some smaller logs on top. Next, you may wish to add a layer of branches, then a layer of small sticks and twigs.
4. Water the layers well.
5. Fill in the spaces between the logs, twigs and branches with leaf litter and manure/kitchen scraps.
6. Last, top off the bed with 6-8” of top soil or compost and a layer of mulch.
Hugelkultur beds work best when they are roughly 3 feet high, although this method can successfully be used in any raised bed setting—you would just need to dig down about 2 feet, then begin the process to build the bed, adding enough leaf litter/manure/kitchen scraps to raise the bed a foot above the ground level.
If you can, prepare the hugelkultur bed in the fall for spring planting, as it works best after it’s had time to ‘cure’; however, this method can be implemented immediately, so a spring construction will still be successful. The bed will be fully mature in about 3 years and will last about 10-15 years. Plant seeds or transplants into the hugelkultur bed as you would any other garden bed.
Have fun, and happy hugelkulturing!
The benefits of hugelkultur garden beds include:
· Moisture retention in the bed
· Increased soil fertility
· Improved drainage
· Repurposing woody debris that
would otherwise be discarded
· Decreased labor required to
produce food
If you have poor soil, areas with poor drainage, an arid environment, compacted soil, health or mobility restrictions, or a host of other gardening issues, hugelkultur would be very beneficial to you; hugelkultur beds are, essentially, large, layered compost piles covered with a growing medium into which a garden is planted. They are easily accessible for planting and harvesting, have been proven to work in deserts, and are virtually carefree once established. No need for annually adding compost or fertilizer, as the breakdown of the buried wood releases many nutrients to your hungry plants above. The decomposition also eliminates the need for tilling the soil, as it aerates it through releasing carbon.
The premise behind this technique is to build a mound, usually 3-5 feet tall; however, the idea can be used in more traditional raised beds, if that is your desire. We created a bed in our raised garden area to test the technique. This is our second year with the bed and so far, we’re pleased with the results. Last season we grew tomatoes; this year we’ve planted lettuces, spinach and onions. We found last year we didn’t have to water the hugelkultur bed even once during the growing season, and it did very well. Some issues you do need to consider include the possibility that the rotting wood beneath the bed can pull nitrogen from the soil and also raise the carbon level too high. To combat this, we added lots of nitrogen rich rabbit manure to the bed when we constructed it. Also, you should avoid using certain types of wood for decomposition problems or toxicity; the best choices for the bed are maple, poplar, alder, apple, cottonwood, birch, and (dry) willow. Avoid oak, cedar, black walnut, locust, and wild cherry.
Some might argue the process isn’t very sustainable because to build the larger mounds, you would need to utilize heavy equipment. That is a valid point; however, this method is widely adaptable and we feel it is sustainable, as well. We hand dug our hugelkultur bed, but even if you use heavy equipment and create a large mound, only the initial building process could be considered ‘non-sustainable’. These beds last several years and require absolutely no watering. They are also eco-friendly in that they use otherwise discarded materials, as well as reduce through sequestration the carbon emissions into the environment.
To create your own hugelkultur bed, follow these simple steps:
1. Select an area approximately six feet by three feet.
2. Gather materials for the project:
· Fallen logs, branches, twigs, fallen leaves. Basically, if you have access to the woods, you have a nice hugelkultur ‘store’ with free materials. The best choices for logs are: maple, poplar, alder, apple, cottonwood, birch, and (dry) willow. Also, using aged and semi-rotting wood rather than freshly cut might help to decrease the pulling of nitrogen from the soil as the logs decompose.
· Nitrogen rich material (manure or kitchen waste work well and help to maintain a proper carbon to nitrogen ratio in the decomposing mass within the hugelkulter bed).
· Top soil or composted soil (enough to cover the other layers of the bed with a depth of 6-8”) and some mulching material (straw or newspaper covered with leaves work well).
3. Lay the largest logs you’ve gathered down as the first layer of the hugelkultur bed. You can follow with some smaller logs on top. Next, you may wish to add a layer of branches, then a layer of small sticks and twigs.
4. Water the layers well.
5. Fill in the spaces between the logs, twigs and branches with leaf litter and manure/kitchen scraps.
6. Last, top off the bed with 6-8” of top soil or compost and a layer of mulch.
Hugelkultur beds work best when they are roughly 3 feet high, although this method can successfully be used in any raised bed setting—you would just need to dig down about 2 feet, then begin the process to build the bed, adding enough leaf litter/manure/kitchen scraps to raise the bed a foot above the ground level.
If you can, prepare the hugelkultur bed in the fall for spring planting, as it works best after it’s had time to ‘cure’; however, this method can be implemented immediately, so a spring construction will still be successful. The bed will be fully mature in about 3 years and will last about 10-15 years. Plant seeds or transplants into the hugelkultur bed as you would any other garden bed.
Have fun, and happy hugelkulturing!
 RSS Feed
